First Cutting of the Greensward in 2022

We do not have a lawn. There wasn't much of a lawn when we moved here and we quickly decided it had to go and be replaced with trees and plants.

Lawns require a level of care and maintenance that far outweighs their usefulness, in our opinion, and they are severely lacking in biodiversity. That is not to say lawns are bad per se; they can be great as a childrens' playground, croquet pitch, badminton court, cricket square, etcetera, etc. And if you're not 'into' gardening then it may be a simpler option and far better than paving over the garden.

We are, however, grateful to our next-door neighbours for donating their grass cuttings so I can compost them. I will discuss the value of grass mowings in the composting cycle in future posts.

Yesterday, we received the first cutting of the year from our neighbour's turf: 27th February 2022. My first thought was that this seemed early. Checking my 'compost' records, where I note the types of material added to my hot composting bins, I discovered the first cut in 2020 was 19th March while for 2021 it was 15th March. So my first thought was indeed correct; this year's first greensward cut was, by two to three weeks, the earliest recorded (albeit, the record only goes back to 2020!).

This is another example of phenology. Obviously, the record is too short to draw any conclusions at the moment but it may be a useful proxy for changes in weather and climate.


Hereford Floods - February 2022

After three named storms in a week - Dudley, Eunice and Franklin - the wind subsided and the sun came out. Yesterday, it was time (3 pm, 21/2/22) to get some fresh air with a walk down to the River Wye. Rain in mid-Wales, where the source of the River Wye lies, takes 24-48 hours to work its way downstream to Hereford. If there is lots of rain in mid-Wales, then Hereford is susceptible to flooding.

Trying to find out how much rain had fallen in mid-Wales proved more difficult than I expected. I found this newspaper report saying 150 mm (6 inches) had fallen in upland Wales which had led to severe flooding along the River Severn. Eventually, I found a weather station (on the Davis Weatherlink network) at Rhyader that showed 203.2 mm (8 inches) of rain over the period of the three storms. The average rainfall in Rhyader is 100 mm (4 inches) for the whole of February! 

This photo was taken from the Hunderton Bridge on the Great Western Way looking towards the city. The river level was 5.2 metres (normal range 0.1 metre to 3.30 metres) and still rising, reaching its maximum (5.38 metres) about 6 hours later.

I guess there will be no rugby played this weekend at Hereford RFC...


...and fortunately, it is half-term for Hereford Cathedral School as the playing fields are under water...

February 2022 floods in Hereford

...the old Wye Bridge (built 15th Century, rebuilt/widened 17th Century, grade 1 listed) was temporarily closed at peak flood levels but lives to tell another day... 


...while De Koffie Pot (centre-right), one of our favourite eating and meeting places, just about avoided the flood water unlike 2 years ago; the benefits of some extra flood barriers clearly paid off...


...meanwhile, this picture taken from the old Wye Bridge shows the flood barriers in place protecting the houses and businesses alongside the river...


...with this view from the other side of the flood barriers showing what a good job they do. The Environment Agency still had people (yellow jackets) and equipment on site as the peak flood level was still a few hours off...


... and finally, on my way home, I took this photo of Greyfriars Avenue which runs down to the river and Hereford Rowing Club...


Two years ago, this road and its houses were severely flooded - it looked more like a canal as this picture from The Telegraph shows...


February 2020 had the highest flood levels (6.1 metres) ever recorded at Hereford Bridge Station due to a combination of Storm Dennis and exceptional local precipitation (100 mm, or nearly 4 inches, in 24 hours). This year, local precipitation was modest (26.8 mm over 3 days) which certainly helped.

Thankfully, as I post this, the floods are receding and levels are already below 4 metres.


First Daffodil of Spring


Continuing on the theme of early spring flowering, this pot of daffodils was blooming on February 10. They may have flowered a few days earlier but were tucked away so not on show. Located on a sunny patio, these are expected to be the first to flower in the garden. The ground-planted daffodils in the Secret Garden are in bud - but have a north-facing aspect so will flower later.


The flowering daffs shown in a previous post do not count as they were purchased this year from a market stall and will have been brought on in a glasshouse.

View from the Rear Window - January 2022

January 1st 2022 was unseasonably warm with a maximum daytime temperature of 15 oC and a minimum nighttime temperature of 12 oC. Generally quiet in the garden with the winter-flowering cherry still producing and the sweet scent of Sarcococca brought out by the warmth...

...the middle of the month (12th - 22nd) featured a period of regular night frosts - illustrated here by this photo from the 13th...

...while the end of the month (26th - 31st) had warm days (mean 11 oC) and cool nights (mean 2 oC)...

Jobs in the Garden

Although January can be a quiet month in the garden, there are still a few things to do.

1. Composting continues throughout winter using the hot composting process. Only one of my three hot composters runs over winter because of the lower volumes of kitchen and garden waste.

2. Early Purple Wight soft-necked garlic was planted outside on 1st January after starting off in the cold greenhouse three weeks earlier

3. Last of the Blue Danube potatoes dug up (about 20 kg)

4. Final celeriac roots dug up from the Greenhouse Sensation vegetable planter

5. Continue to harvest parsnips, kale, chard and brocolli harvested from the kitchen garden

6. Start pruning grapevines

7. New seed potatoes arrive (Blue Danube from D.T. Brown); placed in trays to chit

8. Add mature garden compost to fruit bed (grape, blueberry, raspberry)

January 2022 Weather

Summary of key weather parameters are collated in the table below:

January 2022

Weather Parameter

Value

Dates

Average Monthly Temperature 

9 oC


Maximum Monthly Temperature

15 oC

1st

Minimum Monthly Temperature

-4 oC

14th & 21st

Number of Air Frost Days

15


Number of Hot Days (> 25 oC)

0


Monthly Precipitation

15.8 mm


Greatest 24 h Precipitation

8.0 mm

1st - 2nd

Number of Dry Days

20


Monthly Sunshine Hours (estimated)

44.5


Average Wind Speed

3 km/h


Highest Wind Speed

45 km/h

29th

Maximum Barometric Pressure (Sea Level)

1043.1 hPa

12th

Minimum Barometric Pressure (Sea Level)

992.8 hPa

8th

Average Barometric Pressure (Sea Level)

1025.3 hPa


A graphical representation of the daily minimum and maximum temperatures is presented below. This shows a period of warm days and nights at the very beginning of the month, frosty nights in the middle, and warm days with cool nights at the end of the month.


The next plot shows the daily rainfall and average solar radiation for January 2022. Rainfall was low and occurred, mainly, at the beginning of the month. The warm days/nights at the beginning of the month were overcast/wet whereas the warm days/cool nights at month-end were sunny with generally clear skies at night.


Finally, January weather parameters for 2020, 2021 and 2022 summarised below.


Compared with the earlier years (2020 & 2021), this January was warm, though with a high number of frosty nights, while sunshine hours were average and rainfall was low. The Met Office reported January 2022 as England's sunniest since 1919. This appears to contradict the data from my Davis weather station until you look in more detail at the Met Office report. Sunshine hours were low to average in the south and West Midlands (where Hereford resides) but very high in East Anglia, East Midlands and the North East. Early flowering snowdrops & cowslips (on New Year's Day) were a consequence of a warm January.


Storm Eunice

 Yesterday (18 February 2022) was spent hunkered down at home as Storm Eunice approached and passed. The only damage was a shared fence with our next-door neighbours...


Unfortunately, our neighbours across the road suffered some roof damage...


Our Davis weather station recorded a peak gust of 64 km/hour (40 mph in old money!). We live in a built-up area and the anemometer is positioned about 5 metres (16 feet) above ground level so is not expected to see the full force of the wind.

Checking back over the historical data from our weather station (since Nov 2019), I can see there are only 4 occasions when gusts over 60 km/h were recorded. These all coincide with named storms.

11 January 2020: Brendan (60km/h)
5 February 2020: Ciara (61 km/h)
17 January 2021: Christoph (66 km/h)
18 February 2022: Eunice (64 km/h)

So, although Eunice did not have the highest wing speed, beaten a short head by Christoph, it definitely caused more damage.

Storm Arwen in November 2021 'only' achieved a gust of 58 km/h.


Common Hill Nature Reserve and the Big Farmland Bird Count

 We have posted previously about Common Hill Nature Reserve, near Fownhope, Herefordshire. The voluntary Warden asked if we could do an avian survey as part of the Big Farmland Bird Count. This is a good time of the year for spotting as the birds have nowhere to hide in the, largely, leafless trees. On the downside, it can be a bit windy, wet and cold in February. Nevertheless, we popped over to Common Hill on the afternoon of February 12 to see what we could see and take a few more photos. Go to the end of this post to see which birds we saw on our visit.

View from the entrance of Common Hill next to small car park (you can just see Mary's legs as she tries to hide off shot)...

...view from the corner of the orchard in North Meadow...

...view from the bench at the top of North Meadow...

...looking up Monument Hill from the Herefordshire Wildlife Trust sign...

...looking down Monument Hill from the bench...

...looking down Round's Meadow..

...and the Old Cider House from near the entrance gate...

Bird List (Common Hill, overcast, 8 oC, 3 pm, Saturday 12 February 2022)

Blackbird   (x3)

Blue Tit   (x6)

Buzzard   (x1)

Coal Tit   (x1)

Collared Dove   (x1)

Fieldfare   (x15)

Great Spotted Woodpecker   (x1)

Great Tit   (x2)

Pheasant   (x1)

Robin   (x2)

Rook   (x1)

Woodpigeon   (x8)

Phenology - Real Time Observation of a Warming Planet

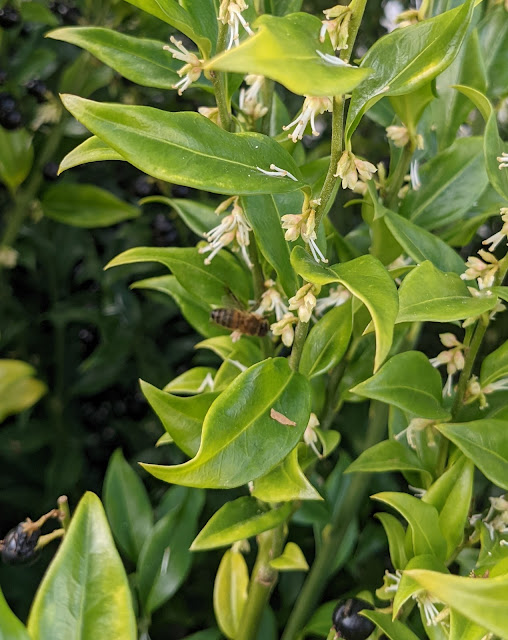
Phenology is the study of cyclic/seasonal phenomena in the natural world; e.g. the emergence of leaves, buds, flowers & fruits in plants, the first cuckoo call of Spring and the appearance of frogspawn in the garden pond. Variations in the timings of these natural events are used as proxies for changes in climate and habitat.

It has become abundantly clear to naturalists and, indeed, anyone who spends a significant amount of time outdoors (farmers, gardeners, anglers, ramblers, etc), that Spring now arrives earlier and Autumn finishes later than it did even 30 years ago (the generally-accepted time period for detecting climatic change).

So this item on the BBC website, UK plants are now flowering a month earlier due to Climate Change, caught my eye. The BBC is generally better at reporting science than, say, the Daily Mail but I will always revert to the primary source, if it is readily available, to check whether the science journalist has correctly reported the scientific findings. Fortunately, the scientific paper on which the BBC based its story is free and available here. So I downloaded a copy and read it.

[tl:dr the BBC report accurately reflects the scientific paper]

The paper is titled 'Plants in the UK flower a month earlier under recent warming' and is published in the Proceedings of the Royal Society B (Buntgen U et al, Proc. R. Soc. B 289), a peer-reviewed journal.

The authors analysed nearly 420,000 observations, taken between 1753 and 2019, of the First Flowering Date (FFD) of 406 UK plant species. The geographical spread of the observations was impressive from the Channel Islands in the south to the Shetland Islands in the north and from Northern Ireland in the West to Suffolk in the east. Herbaceous plants (54%) made up the largest group followed by trees (33%).

The most robust data (i.e. most observations) are from 1952 to 2019 that can be divided into two 34-year periods for comparison: 1952-1985 (< 1986) and 1986-2019 (>1987).

There were sufficient data points to enable the authors to differentiate FFD between 'north' and 'south' (above or below Manchester), 'rural' and 'urban' and 'high' and 'low' (above or below 82 m elevation). There is a lot of information in this paper which can be distilled into a few key points. As you would expect from any good scientific study, the authors discuss deficiencies in the data set and differentiate between facts and opinion. In summary:

  • FFD for herbaceous plants is, on average, 32 days earlier for the current period (1987-2019) compared with the earlier period (1952-1986)
  • FFD for trees is, on average, 14 days earlier for the current period (1987-2019) compared with the earlier period (1952-1986)
  • FFD for the 'north' is, on average, 29 days earlier for the current period (1987-2019) compared with the earlier period (1952-1986)
  • FFD for the 'south' is, on average, 25 days earlier for the current period (1987-2019) compared with the earlier period (1952-1986)
  • FFD is, on average, only 5 days later in the 'north' compared to the 'south' in the current period (1987-2019) but used to be 9 days later in the earlier period (1952-1986)
  • FFD for 'urban' areas is, on average, 25 days earlier for the current period (1987-2019) compared with the earlier period (1952-1986)
  • FFD for 'rural' areas is, on average, 27 days earlier for the current period (1987-2019) compared with the earlier period (1952-1986)
  • FFD is, on average, 2 days later in 'rural' areas compared to 'urban' areas for the current period (1987-2019) but used to be 4 days later in the earlier period (1952-1986)
The authors propose a hypothesis to explain the evidence (observations/measurements) by first considering which factors might affect FFD? Global warming is an obvious one but we would also want to consider photoperiodism (daylight length), fewer/less severe frosts, changes in precipitation, wind speed, pollinating insects, urban sprawl, etc. An educated guess would be that if late winter/early spring temperatures were warm, these would encourage early flowering [NB: mean FFD were mid-April to mid-May]. The authors found statistically-significant correlations between FFD and the January - April maximum temperatures; February mean, maximum and minimum temperatures were more significant than those of January, March and April. 

In plot (a) below, taken from the Buntgen et al paper, mean FFD are plotted as a time series. Around the mid-1980s, there was a change in the Winter Index of the North Atlantic Oscillation (NAO) from negative to positive mode which coincided with the FFDs becoming earlier and earlier. In plot (b), mean January-April maximum temperatures for the British Isles (orange) skillfully model the changes in FFDs. This forms the basis of the authors' hypothesis: over the last 30-35 years, the increasing winter/spring maximum temperatures arising from a combination of global warming and a positive NAO are causing  FFDs to become earlier and earlier. A scientific hypothesis must be falsifiable; in other words the hypothesis must be testable and have some predictive properties. For example, if the NAO switches back to its negative mode then we would expect the trend to earlier and earlier FFDs to slow down or even reverse if global temperatures stop rising.


FYI:  The NAO is a weather phenomenon over the North Atlantic Ocean resulting from variations in the pressure differential between Icelandic low pressure and Azores high pressure regions. A positive NAO means warm wet winters in the UK whereas a negative NAO brings cold dry air. Below is one example of an NAO index based on December-March pressure data showing the shift from negative to positive NAO, albeit with considerable interannual variability.


Making a beeline for...


🐝🐝🐝🐝🐝🐝🐝🐝🐝🐝🐝🐝🐝🐝🐝🐝🐝🐝🐝🐝


...the Sarcococca bush.

It was the same warm sunny February day. The air was filled with an intense sweet-smelling fragrance and there was a definite buzz in the garden. My olfactory and aural senses led me to this Sarcococca bush tucked away in a corner of the garden.

This winter-flowering shrub was chock-a-block with flowers as the warmth of the winter sun distilled its sweet perfume into the surrounding ether. The slight breeze (4 km/h) wafted the scent to all parts of the garden so its bouquet could be detected from a distance of at least a perch (or pole or rod).

Its a real shame the 'Internet' doesn't have Smell-O-Vision (or Aromarama) otherwise you could also enjoy the rich & aromatic scent of Sarcococca

Birds visit the Sarcococca for their small black berries. Today, we had another visitor. A dozen or so honey bees collecting nectar. This explained why there was a buzz in the garden!

Honey bees are normally seen between May - September or April - October depending on where you source your information. So February 7th does seem a little early!

Finally, a little poem we used to recite to our children to get them to eat their greens:

I eat my peas with honey

I've done it all my life

It makes the peas taste funny

But it keeps it on the knife

Ogden Nash


Raspberries and Strawberries

 A warm sunny February day (maximum temperature 15 oC) and a few jobs to do in the garden.

First, check the HotBin composter temperatures. Doing nicely at 55 oC so add 6 litres of shredded garden waste, 2 litres of kitchen waste and 120 g of biochar. Mix. Check again tomorrow.

Second, the bare root raspberry plants from Thompson and Morgan arrived this morning. Three varieties (Glen Prosen, Glen Ample and Autumn Bliss) so we can pick delicious raspberries from June to October. Although only the autumn-fruiting variety (Autumn Bliss) have a chance to produce fruit this year.

I have some raspberries (Sugana and Polka) already but these were not looking as healthy as they normally do, so it's time to plant some more in a different location just in case. There was some space behind my apple and plum trees alongside a SE facing wall. I moved my comfrey tea set-up and a few odds and ends; later, I will add some horizontal wires to support the growing raspberry canes.

Today's job is to get the raspberry plants into the ground. Rake back the bark mulch, dig 6 x 6 x 6 inch holes. Fill with sieved garden compost. Plant bare-root plants so the roots are about 3 inches below the surface. Cover with a little of the excavated soil, firm soil around plants with boot and water in (3 litres per plant). Finally, replace the bark mulch, cut down the canes to 6-8 inches & add a label.


Third, time to clean up the strawberry plants in the Wonderwall planters. Strawberries are a great grow-it-yourself summer fruit crop because the flavour is always better than anything you can buy in the shops. Unfortunately, the great flavour also attracts birds, slugs, woodlouse and other pests who always seem to get there first, just as the fruit hits peak ripeness. I was hoping the Wonderwall wall planters would reduce some of the pest damage - however, it didn't take long for the blackbirds to find. I shall try to rig up some netting this year. I don't mind sharing but I think I deserve 80% of the yield since I've put in all the effort!


Some strawberry plants had died, others had become smothered in weeds (I suspect those blackbirds again). Take out the pots, extricate the rootball, remove any weeds along with some of the soil and repot using a coir potting compost. Replace and water.


Because some plants had perished, there are quite a few empty pots. Fortunately, there were plenty of strawberry runners hanging down. Normally, these would be pinned down in a soil-filled plant pot to root after the fruiting season has finished (i.e. late summer). I'm too late for this so I thought it worth a try placing the runners in a heated Hydropod propagator from Greenhouse Sensation. This misting propagator encourages root formation while minimising root rot and fungal infections. I haven't tried it with strawberries so we'll see how it goes.


Make Your Own Wedding Place Cards

This is a guest post from my daughter who trades as The Merry Giraffe selling cards and stationery. Her Etsy shop is here raising funds for the Oxford Heart Centre and the Royal Berks Cardiac Unit. This post describes how to make your own place cards for weddings, parties, etc. If you would prefer to buy ready-made then pop over to the Etsy shop. Now, over to The Merry Giraffe...


How to Make Your Own Place Cards for Your Wedding or Party!

In its simplest terms, a place card tells your guest where to sit. However, it can also double up as a fun bit of table decor, tying in with your theme and, also, as a keepsake for your guest to take away. They are commonly used at weddings and other formal events but can also be a lovely touch on a family dinner or party you are throwing (not least to make sure you don’t end up sitting next to someone boring!). 

Whether you are working to a budget or you just enjoy making things, making your own place cards is a great thing to do and means you can match your chosen theme perfectly and add that personal touch that your guests will really appreciate.

If you google "Place Cards" you will see that pretty much anything can be used as a place holder. Take almost any object, find a way to put someone's name on it and voila! I have seen leaves, stones and plant pots turned into place labels - your imagination is the limit!

For this post, however, we will be focusing on folded tent place cards as they are simple, blanks are widely available and it makes a great beginner's project.

You can make your own blank place cards by cutting squares of card measuring 8.5cm x 8.5cm and scoring down the middle. When folded, this will create the tent shape which allows them to stand up. Of course, you can change the size as needed depending on the look you are going for and the space available on your table!
If you prefer, you can buy packs of ready cut and scored place cards. Amazon, eBay and many other places sell them, and there is often a choice of colour and finish (i.e. smooth, hammered, linen effect). At the time of writing, you can pick up a pack of 100 blank white smooth place cards on eBay for just over £4 which I think is very reasonable!

So - let’s get making! I have created a few different designs to walk you through. For some of these, you may have everything you need already at home. I love crafts and have a short attention span so I am fortunate enough to have boxes and boxes of bits lying around waiting to be used! Feel free to adapt these ideas to work with what you have available and I’d love to hear about your creations!

For all crafting activities, I recommend working on a solid surface with good light with something on top of the surface to protect it. I use an old wooden backing from a photo frame that is a good size but newspaper does an equally good job!


Place Card Design 1 - Felt Flower Place Card


I love this design, and it is one I will definitely be using for the next dinner party we have! It is simple to make but very effective!

Materials

You will need:
Felt in the colour of your choosing - ideally 2 different colours, one for the flower and one for the leaves. 
Hot glue gun 
Scissors - good sharp fabric ones will make your life easier!
Place Cards

Method

Step 1 - Take the felt you would like for the leaves, cut out two leaf shapes approximately 2 - 2.5cm (1 inch), I cut mine free hand - just an oval shape with pointy ends. If you aren’t confident enough to do this then sketch a leaf the right size and shape on a scrap bit of paper and cut it out. Place the paper leaf over the felt and cut round it. 

Step 2 - Take the felt you would like to use for the flower. Cut a circle approximately 5cm in diameter (don’t worry - it doesn’t need to be perfect) and then starting at one edge cut in a spiral shape towards the centre of the circle so you end up with something like the picture below. 

Step 3 - Starting at the outer part of the spiral, roll the felt (relatively tightly) and keep rolling until you have used up all the spiral and the ball shape that was in the middle of the spiral is left. Apply glue to the base of the rolled flower and then fold the ball shape end over the bottom of the flower, covering the glue you have just applied. Glue one leaf on the bottom, and then the other. This is your felt flower!

Step 4 - Use your glue gun to attach the flower to the place card - and you’re done! Repeat for as many place cards as needed and then add your names!


Place Card Design 2 - Place card with Ribbon


The easiest way to jazz up a place card, simply glue a strip of ribbon or similar to the place card!

Materials

You will need:
Place Cards
Hot Glue Gun
Trim in the design of your choosing - I had some pompom trim and velvet ribbon I decided to use but you could use anything here - lace, hessian, ribbon etc
Scissors

Method

Step 1 - Put your place card flat on the surface you are working on. Take your trim and place it over your place card allowing a centimetre each side to fold round the back and cut to size. Move the trim out the way and apply glue to where you want it to go. Quickly, before the glue dries, place the trim in position and hold down until dry.

Step 2 - Flip over the place card and glue the ends down to hide them. Repeat for as many place cards as you need!


Place Card Design 3 -  Glitter Place Card


Add bit of glam to your party! You can get glitter in all sorts of beautiful colours, I raided my daughters craft box and found a lovely gold!

Materials

You will need:
Place card
Mod Podge/PVA glue
Glitter
Paintbrush
Piece of A4 paper folded in half and then opened back up

Method

Step 1
- Put your place card flat on the surface you are working on. Take the paintbrush and dip in the glue, paint the glue on the place card wherever you want there to be glitter, I did a wavy section at the base of the place card but you could do a stripe, a heart shape or dots, just be sure to leave room for where you are going to write the name. Try to be neat around the edges because at some point you will need to put the place card down to dry and you don’t want it to stick to whatever you put it on.

Step 2 - Holding the place carry over the piece of A4 paper, sprinkle the glitter over the card, fully covering all the areas covered in glue. The glitter will stick very quickly so just wait a few seconds and then you can gently shake off the excess glitter. Put the glittered place card to one side. Lift up the A4 paper at each end so that all the excess glitter collects in the crease, and pour back into the glitter pot to be used next time. 

Step 3 - If there are any areas that need more glitter then you can reapply some glue to those spots and add more glitter - TOP TIP - only do this once the first layer is completely dry! Repeat on other place cards until you have the number that you need.

If you want to use multiple glitter colours on the same place card then follow the same process but ensure the glitter from one colour is dry before you apply glue for the next colour.

Place Card Design 4 - Beach Place Card


This is the most complicated design but well worth the effort, I think this is so pretty and effective for a beach theme wedding!

Materials

You will need:
Place Card
Mod Podge/PVA glue
Sand (yes real sand, I nicked some from my daughters sandpit). If you can’t get hold of sand in the small quantities needed, you could use a pale yellow glitter, or even golden granulated sugar!
Paintbrush
Acrylic Paint in blue, green and white, I also had a lovely pearlescent white which I used for a bit of extra shine
A4 paper, folded in half and then flattened back out.

Method

Step 1 - Using your paintbrush and glue, paint a wavy line from the middle left of the flattened place card down to the bottom of the place card, just over 50% of the way along. You want the line to be approx half a centimetre wide but it will look better if the width varies slightly.  Holding the place card over the A4 paper,  sprinkle sand over the glue, and after a minute you can gently shake off any excess. Pop it down to dry for a few minutes. You can lift the A4 paper with the excess sand and it will collect in the fold, pour it back into your pot of sand to use next time. Clean off your paintbrush.

Step 2 - You don’t need your sand to be completely dried on to move onto the next step but you want to be careful not to touch it too much or you will move it out of position. Using your paintbrush, apply the blue paint in a dabbing motion to the corner of the place card and up to but not quite touching the sand. Depending on the thickness of the paint, you may need to do more than one layer. Multiple, thin layers will dry quicker than one thick layer and also prevent the paint cracking when dry. 

Step 3 - Dip your paintbrush in the green and apply in a dabbing motion in the corner, blending out into the blue. Clean off your paintbrush and then dip into the white and apply in a dabbing motion along the sand line at the edge of the sea, blend into the blue. 

Step 4 - Keep reapplying blue, green and white to achieve the look you are going for. The green gives the impression of deeper sea and the white is the foam tops of wave.  Keep dabbing and blending until you are happy. 

Step 5 - Once the first layer of sand is completely dried, add another layer of glue and sprinkle on more sand. To soften the edge of the sand next to the blank place card dab some bits of glue randomly along the edge and sprinkle on sand. Shake off any excess sand and leave to dry, try to avoid touching any of the painted or sand areas until completely dry to avoid ruining your masterpiece!


Once you have finished your place cards, in whichever design you did, it is time to add the names. I am a little obsessed with calligraphy and used my beautiful oblique calligraphy pen from Toms Studio and gold and black ink to add in the names. You can use any pen you want but be sure to test it first on a spare place card to ensure the ink doesn’t bleed and writes nicely and shows up well depending on the finish and colour of your place card. 


Good luck with your crafting and let me know how you get on!

Rosie x

Rosie is the owner of The Merry Giraffe, a greeting cards, invitations and bunting company that sells on Etsy and Thortful and raises money for Oxford Heart Centre and Royal Berkshire Cardiac Unit. Here are some of the designs she sells - check out www.themerrygiraffe.etsy.com for the full range!


Popular Posts

Blog Archive