This is a guest post from my daughter who trades as The Merry Giraffe selling cards and stationery. Her Etsy shop is here raising funds for the Oxford Heart Centre and the Royal Berks Cardiac Unit. This post describes how to make your own place cards for weddings, parties, etc. If you would prefer to buy ready-made then pop over to the Etsy shop. Now, over to The Merry Giraffe...
How to Make Your Own Place Cards for Your Wedding or Party!
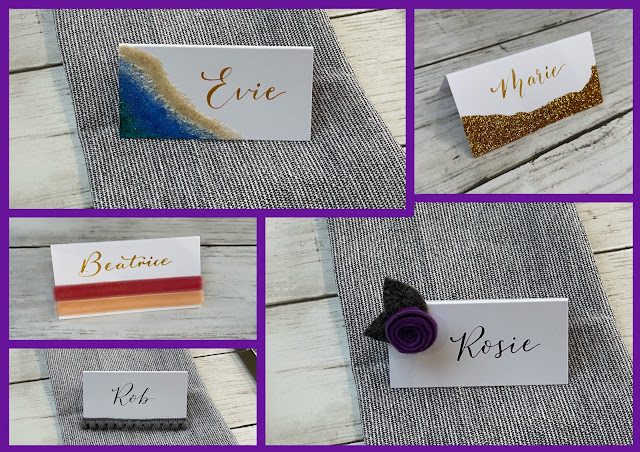
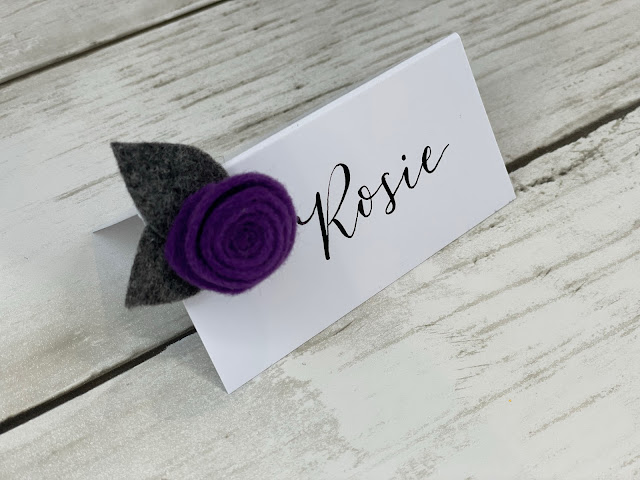
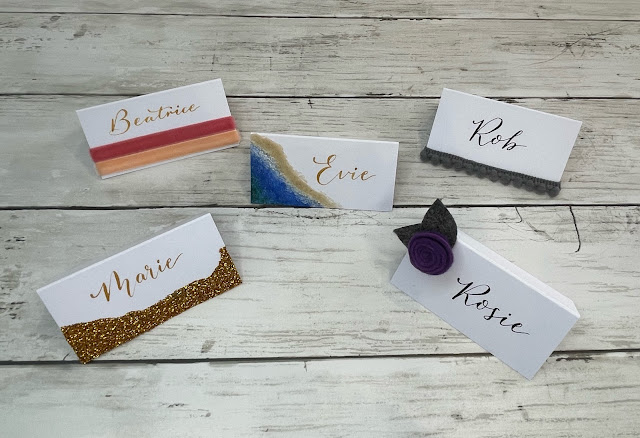
Place Card Design 1 - Felt Flower Place Card
I love this design, and it is one I will definitely be using for the next dinner party we have! It is simple to make but very effective!
Materials
You will need:Felt in the colour of your choosing - ideally 2 different colours, one for the flower and one for the leaves.
Hot glue gun
Scissors - good sharp fabric ones will make your life easier!
Place Cards
Method
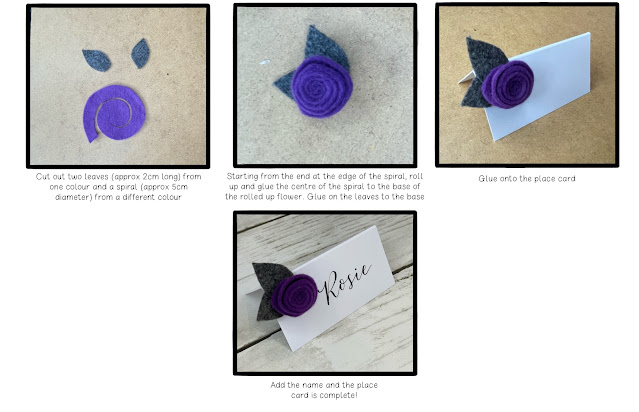
Step 1 - Take the felt you would like for the leaves, cut out two leaf shapes approximately 2 - 2.5cm (1 inch), I cut mine free hand - just an oval shape with pointy ends. If you aren’t confident enough to do this then sketch a leaf the right size and shape on a scrap bit of paper and cut it out. Place the paper leaf over the felt and cut round it.
Step 2 - Take the felt you would like to use for the flower. Cut a circle approximately 5cm in diameter (don’t worry - it doesn’t need to be perfect) and then starting at one edge cut in a spiral shape towards the centre of the circle so you end up with something like the picture below.
Step 3 - Starting at the outer part of the spiral, roll the felt (relatively tightly) and keep rolling until you have used up all the spiral and the ball shape that was in the middle of the spiral is left. Apply glue to the base of the rolled flower and then fold the ball shape end over the bottom of the flower, covering the glue you have just applied. Glue one leaf on the bottom, and then the other. This is your felt flower!
Step 4 - Use your glue gun to attach the flower to the place card - and you’re done! Repeat for as many place cards as needed and then add your names!
Place Card Design 2 - Place card with Ribbon
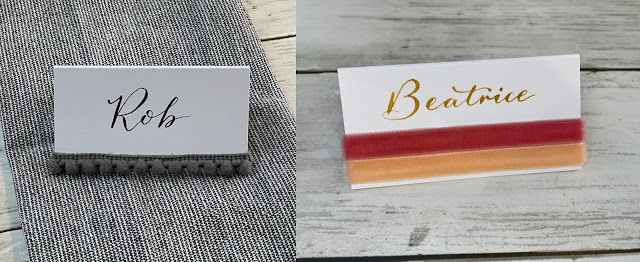
The easiest way to jazz up a place card, simply glue a strip of ribbon or similar to the place card!
Materials
You will need:
Place Cards
Hot Glue Gun
Trim in the design of your choosing - I had some pompom trim and velvet ribbon I decided to use but you could use anything here - lace, hessian, ribbon etc
Scissors
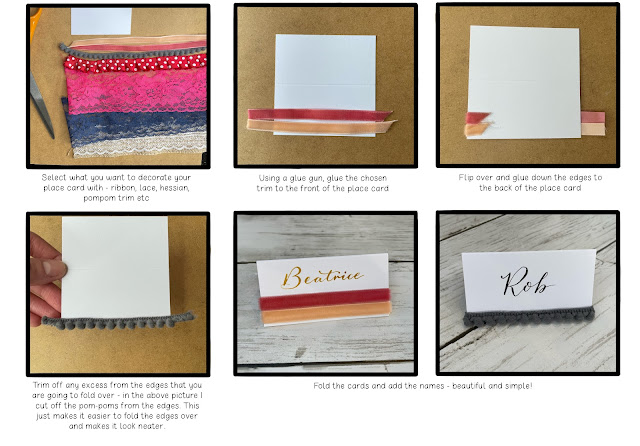
Method
Step 1 - Put your place card flat on the surface you are working on. Take your trim and place it over your place card allowing a centimetre each side to fold round the back and cut to size. Move the trim out the way and apply glue to where you want it to go. Quickly, before the glue dries, place the trim in position and hold down until dry.
Step 2 - Flip over the place card and glue the ends down to hide them. Repeat for as many place cards as you need!
Place Card Design 3 - Glitter Place Card
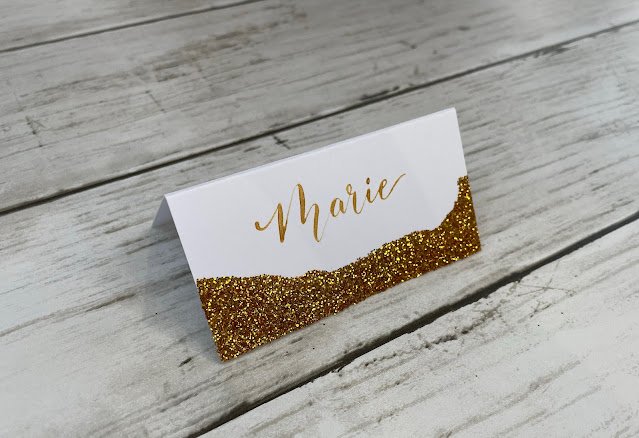
Add bit of glam to your party! You can get glitter in all sorts of beautiful colours, I raided my daughters craft box and found a lovely gold!
Materials
You will need:
Place card
Mod Podge/PVA glue
Glitter
Paintbrush
Piece of A4 paper folded in half and then opened back up
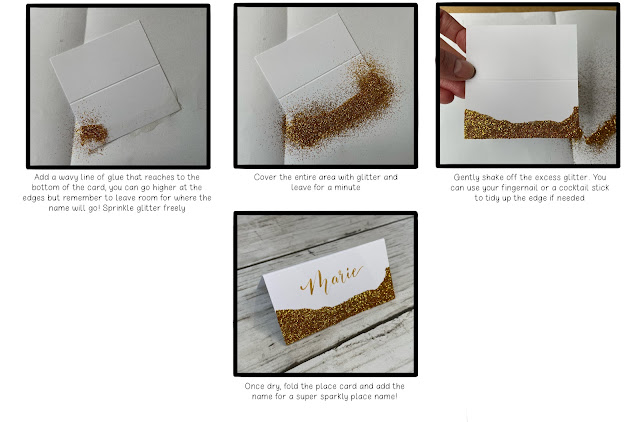
Step 1 - Put your place card flat on the surface you are working on. Take the paintbrush and dip in the glue, paint the glue on the place card wherever you want there to be glitter, I did a wavy section at the base of the place card but you could do a stripe, a heart shape or dots, just be sure to leave room for where you are going to write the name. Try to be neat around the edges because at some point you will need to put the place card down to dry and you don’t want it to stick to whatever you put it on.
If you want to use multiple glitter colours on the same place card then follow the same process but ensure the glitter from one colour is dry before you apply glue for the next colour.
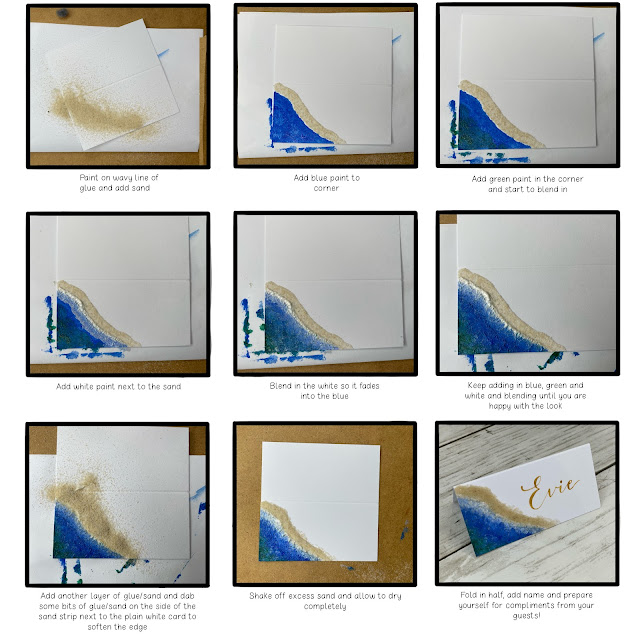
Place Card Design 4 - Beach Place Card
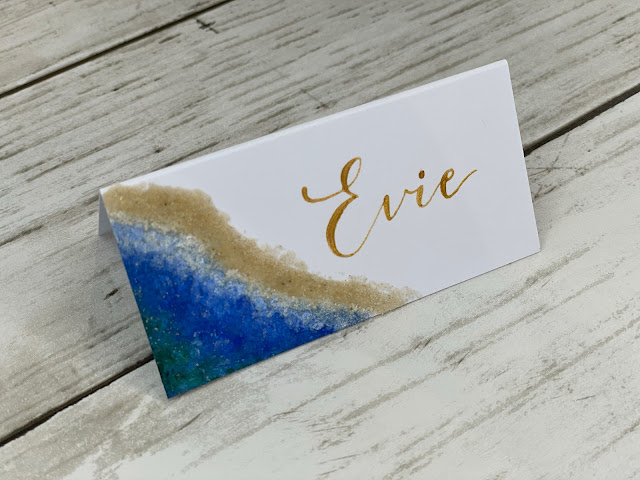
This is the most complicated design but well worth the effort, I think this is so pretty and effective for a beach theme wedding!
Materials
Place Card
Mod Podge/PVA glue
Sand (yes real sand, I nicked some from my daughters sandpit). If you can’t get hold of sand in the small quantities needed, you could use a pale yellow glitter, or even golden granulated sugar!
Paintbrush
Acrylic Paint in blue, green and white, I also had a lovely pearlescent white which I used for a bit of extra shine
A4 paper, folded in half and then flattened back out.
Method
Step 2 - You don’t need your sand to be completely dried on to move onto the next step but you want to be careful not to touch it too much or you will move it out of position. Using your paintbrush, apply the blue paint in a dabbing motion to the corner of the place card and up to but not quite touching the sand. Depending on the thickness of the paint, you may need to do more than one layer. Multiple, thin layers will dry quicker than one thick layer and also prevent the paint cracking when dry.
Once you have finished your place cards, in whichever design you did, it is time to add the names. I am a little obsessed with calligraphy and used my beautiful oblique calligraphy pen from Toms Studio and gold and black ink to add in the names. You can use any pen you want but be sure to test it first on a spare place card to ensure the ink doesn’t bleed and writes nicely and shows up well depending on the finish and colour of your place card.
Rosie x
Rosie is the owner of The Merry Giraffe, a greeting cards, invitations and bunting company that sells on Etsy and Thortful and raises money for Oxford Heart Centre and Royal Berkshire Cardiac Unit. Here are some of the designs she sells - check out www.themerrygiraffe.etsy.com


0 comments:
Post a Comment